
cadwork is the leading 3D-CAD/CAM software for all fields of timber construction. Using a variety of specialized modules it offers a complete solution from drafting to manufacturing.

cadwork is the leading 3D-CAD/CAM software for all fields of timber construction. Using a variety of specialized modules it offers a complete solution from drafting to manufacturing.
Cadwork V29 can add prefixes to the product list/bill of materials when exporting in the view interface. Starting from V30, the prefix addition function is also applicable to container. For example, there are fastener legs in the two areas shown below (red area and blue area). According to the previous method, different production numbers need to be used to distinguish the fastener legs in these two areas, such as the red area leg number 1001 and the blue area leg number 200120022003. Adding prefixes can solve this problem in V30.
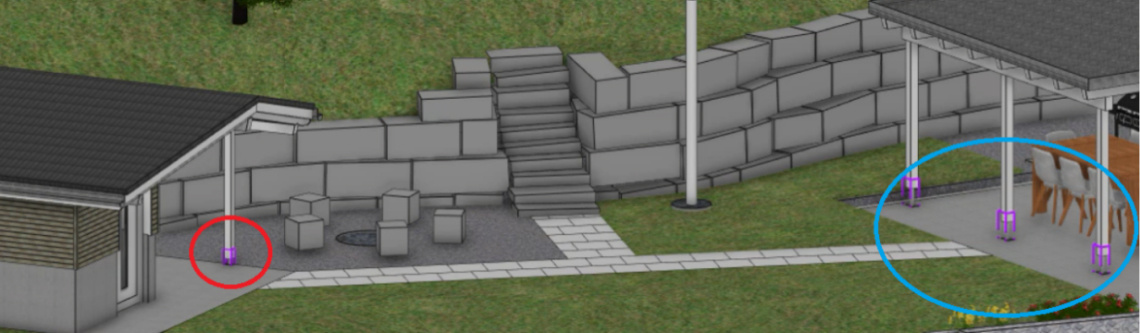
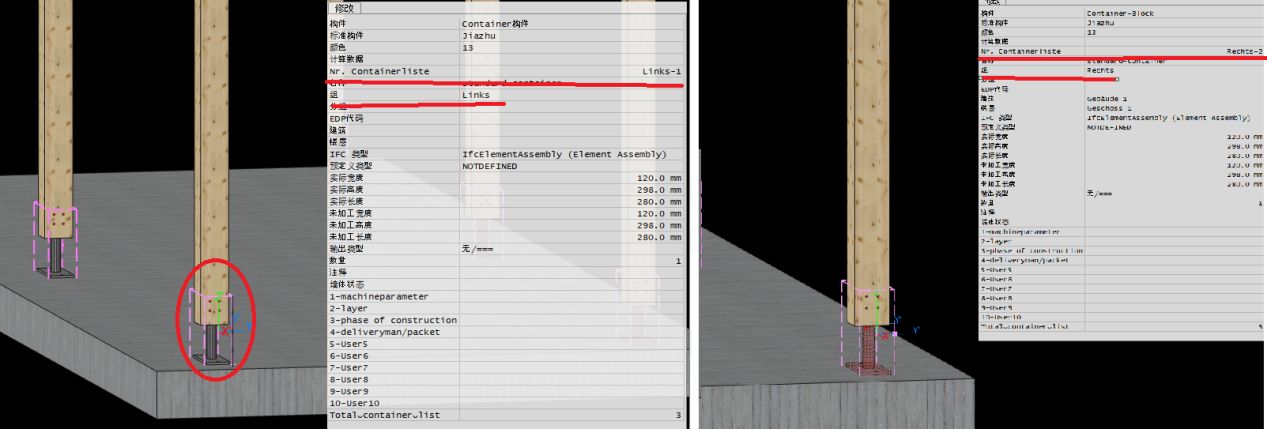
As shown in the figure below, if you want to name the container on the left and right sides of the garage separately, you can first select all the hardware frames on the red left side, set their "Group" attribute to Links left, and then select all the container on the blue right side, and set their "Group" attribute to Rechts right.
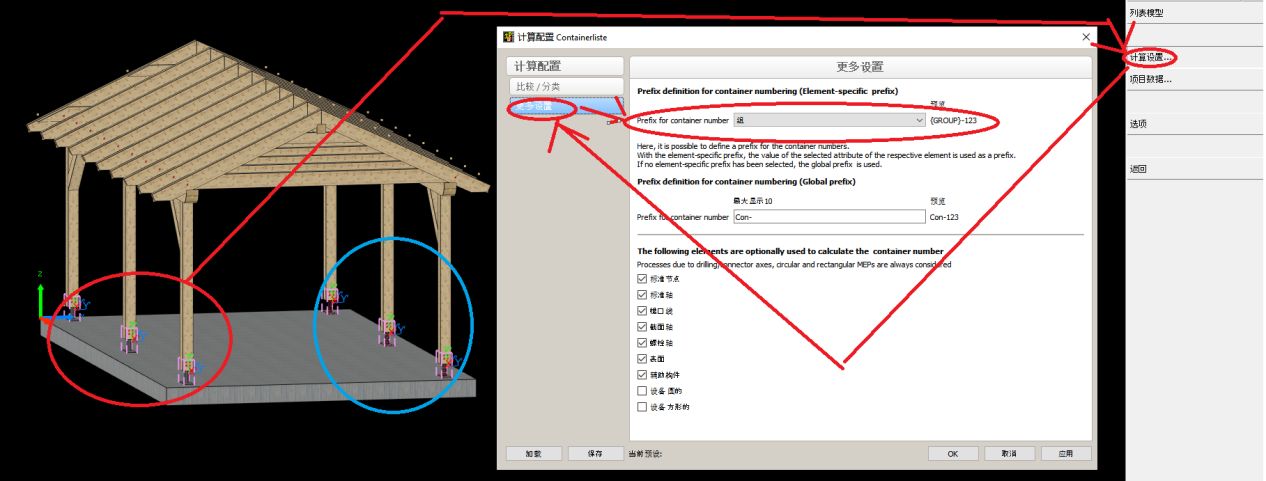
After selecting both sets of containers, in "Output" - "List" - "fastener List" (newly added in V30) - "Calculation Configuration" - "More Options", set the prefix of the hardware frame to "Group", and the previously set left links and right Rechts attributes will automatically hang as prefixes in the number of the container. The same container numbers on the left are all Links-1, and the same container numbers on the right are all Rechts-2.
In the more options settings for container, you can also make arbitrary modifications to the prefix of the hardware frame, or choose any convenient attributes such as "building", "floor", "component name", etc. outside of "group" as the prefix for the hardware frame.
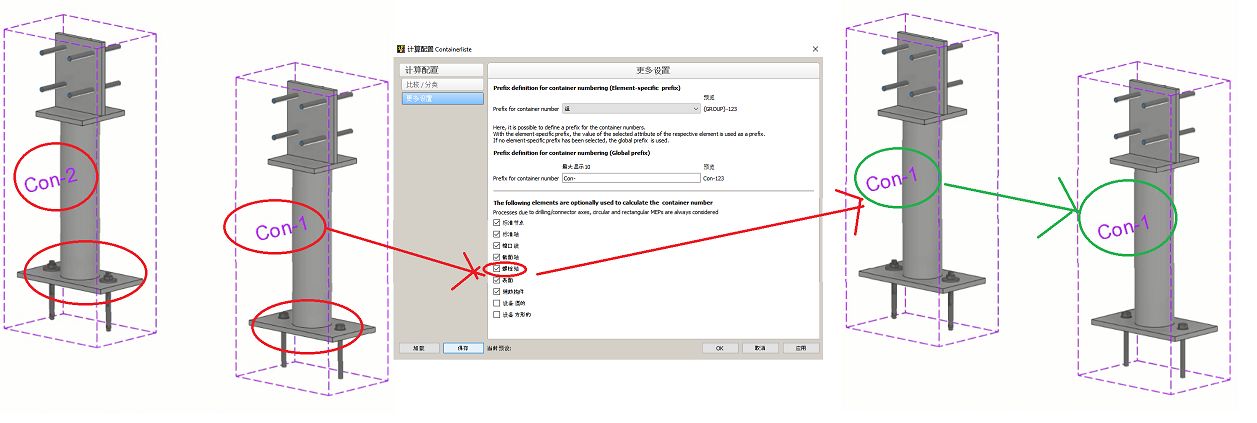
In addition, as shown in the general shape of the figure below, only fastner components with inconsistent local details can have different frame numbers or the same fastener components with different local details by setting the calculation standard for fastener component numbering, The new version of V30 provides more numbering standard setting options for users to easily choose from in this regard.
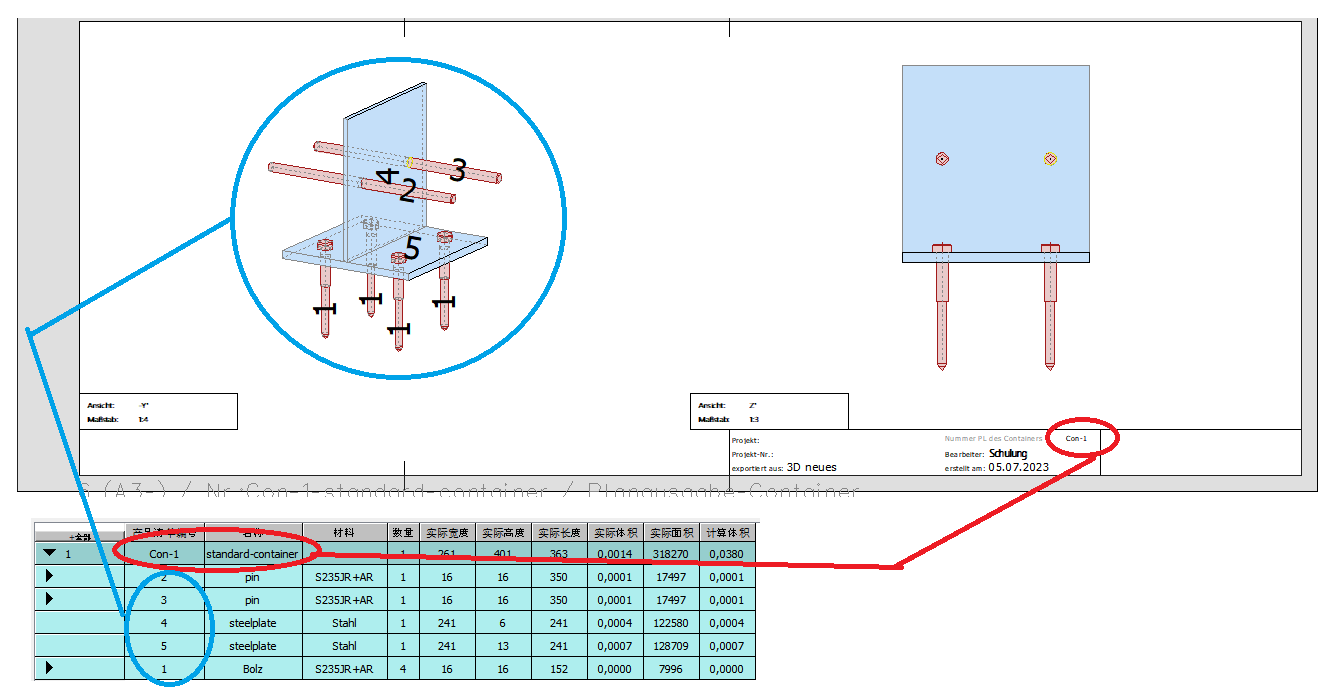
In addition to individual numbering of containers, the production list numbering function in V30 allows for a visual display of the relationship between container and internal components of fastner. This was requested by many designers a few years ago, but can only be completed manually in steps, which is cumbersome and not easy to remember. As shown in the following figure, After selecting all fastner components and container in the V30 new version, two dialog boxes will appear to calculate the product list. After the calculation is completed, the internal sub components of the fastner and the entire container will be numbered.
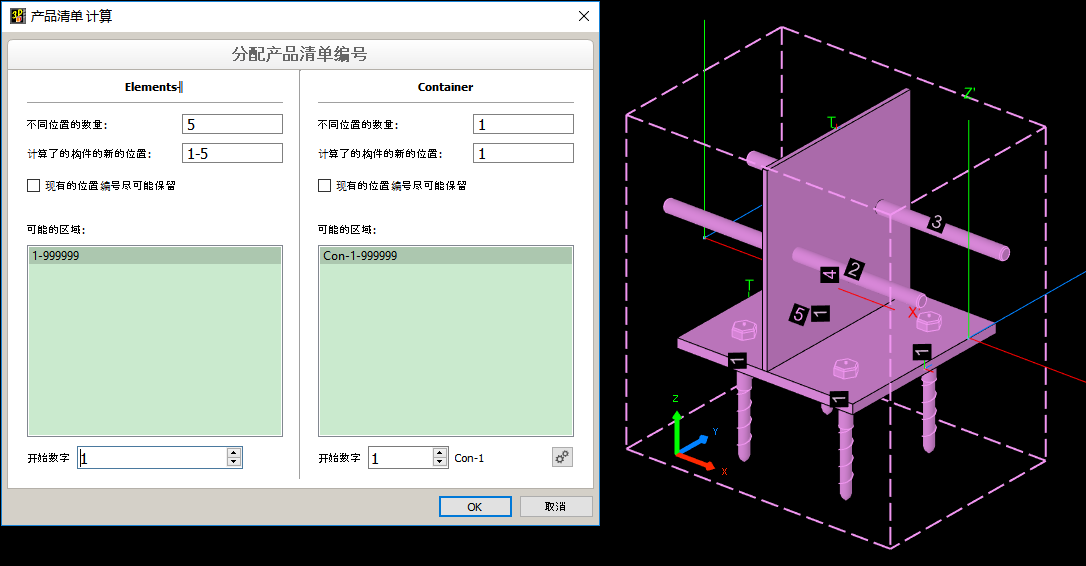
From the following figure, it can be seen that the material list clearly shows which sub components each container contains. The name of the container will be automatically attached to each drawing, so that each sub component of the container in the material list can correspond one-to-one with the sub components on the drawing. This provides great convenience for outsourced processing enterprises in the fastner field. Whether it is production or final assembly of hardware components, it is very convenient to hand them over to the timber construction factory.
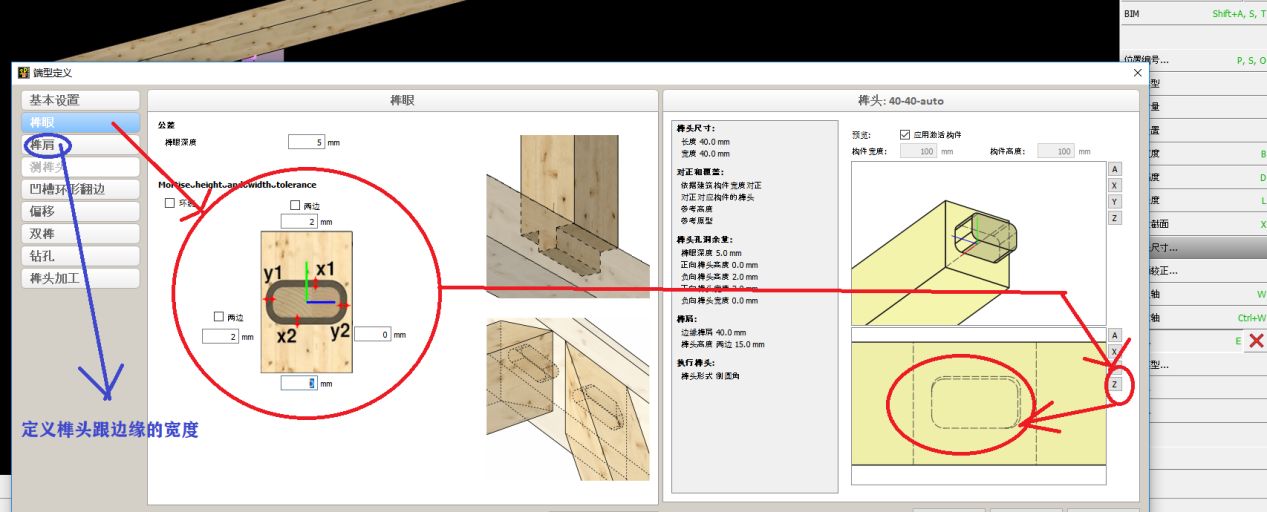
Starting from V30, in addition to defining the clearance between the tenon and the edge of the timber component (indicated by the blue circle in the figure below), the clearance of the tenon can also be defined (indicated by the red circle in the figure below). This feature is very useful because some designers hope that the width of the tenon is 2mm more than the width of the tenon. The previous margin was defined as the depth direction of the tenon, The new feature of V30 can be similar to modifying tenons, conveniently and asymmetrically defining the width of tenon allowance in four directions: up, down, left, right. And synchronously view the modification effect during the definition process.
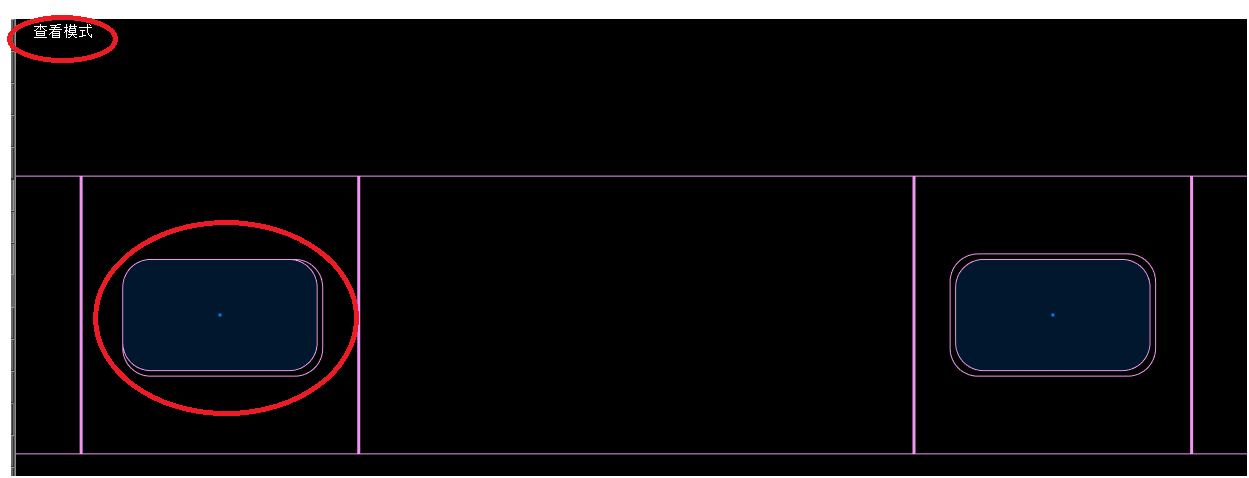
In view mode, Add effect picture of V30 asymmetric mortise allowance. Note that to save computational power, the mortise and tenon can only be seen in viewing mode.In view mode, Add effect picture of V30 asymmetric mortise allowance. Note that to save computational power, the mortise and tenon can only be seen in viewing mode.
Cadwork provides users with a wide range of F1-F12 combination shortcut key function settings. And each designer often has their own usage preferences, starting from V30, The F1-F12 shortcut key settings can be saved as a file or retrieved from a file, making it easy for each designer to access their own combination shortcut key settings.

In terms of the combination key options, the system has added commands such as the "Point Cloud" series, 2D annotation, rangefinder, and drawing layer movement (using combination keys to move non central windows such as collision detection back to the center of the screen). If you want to know all the commands that can be replaced with combination shortcut keys, you can click the button in the following picture to bring up a summary PDF of all replaceable commands.
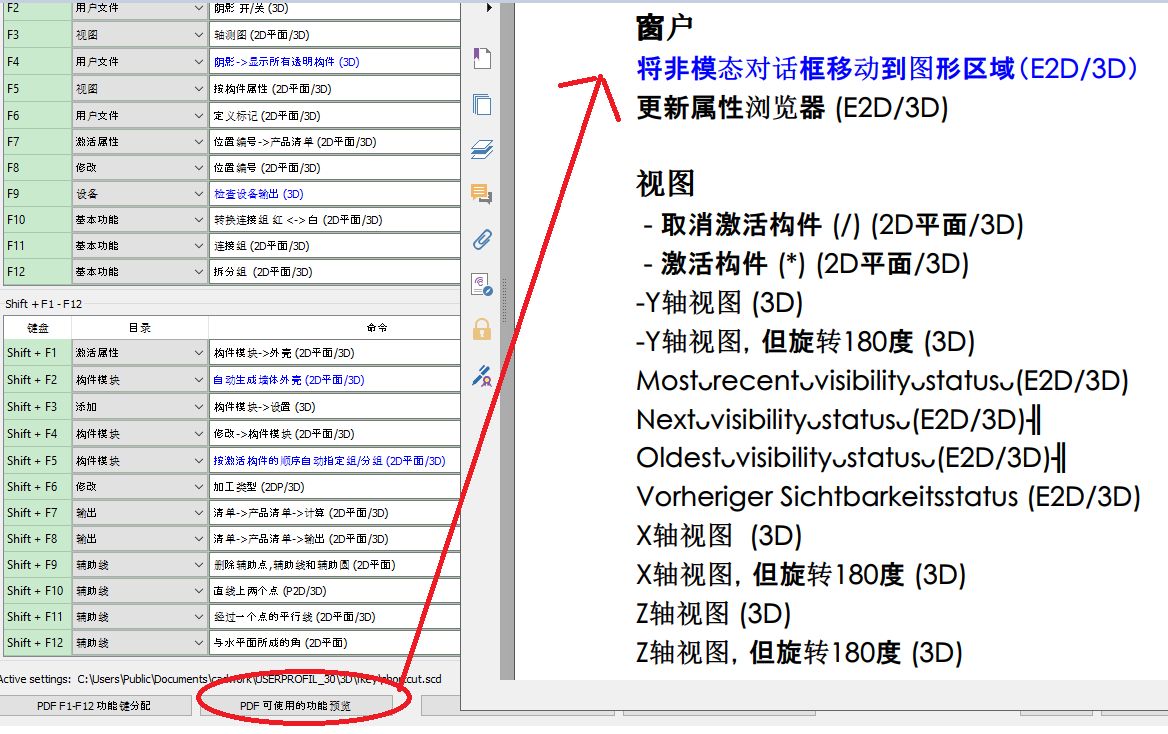
The PDF includes instructions in the F1-F12 shortcut window in two colors: black and blue. The black command can be called in the menu, and can be called faster through the F1-F12 shortcut key combination. The blue command cannot be called in the menu option, but can only be called through the F1-F12 shortcut key combination.
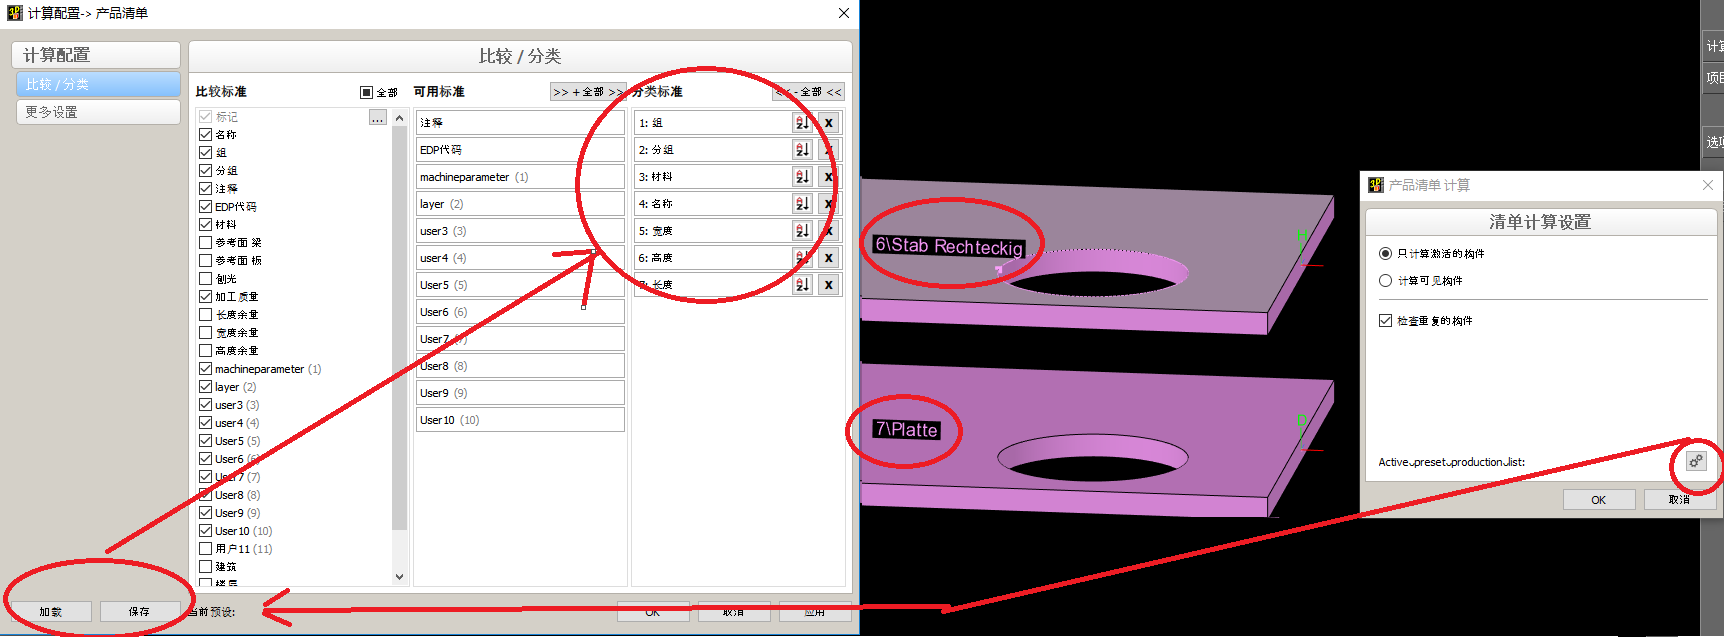
If the external dimensions of two components are the same, but one is a beam (as shown in the beam below) and the other is a plate (as shown in the plate below), two different numbers will be obtained in V30 when calculating the product list. In addition, when calculating the product list, the gear button can be used to easily call up the list calculation standards and call up previously saved product list calculation standards.
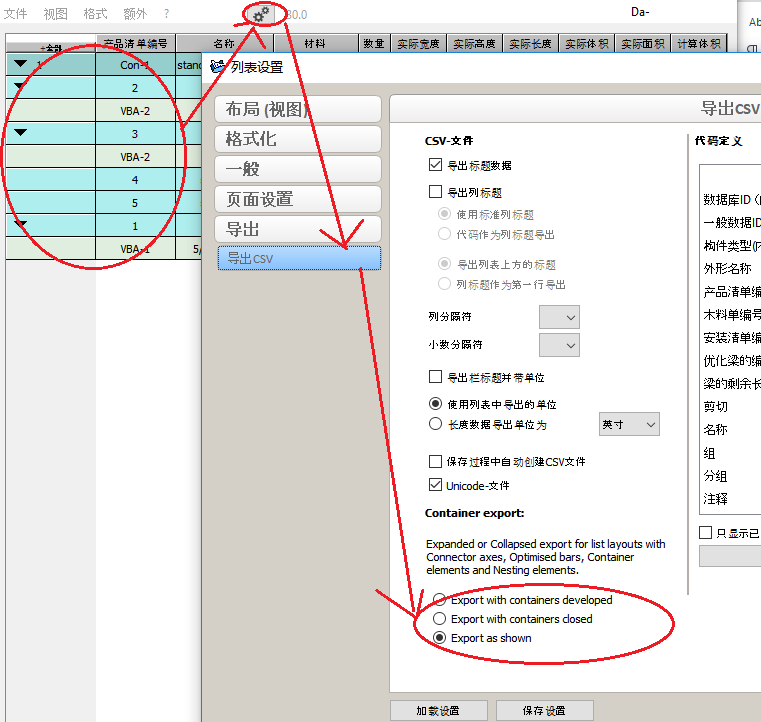
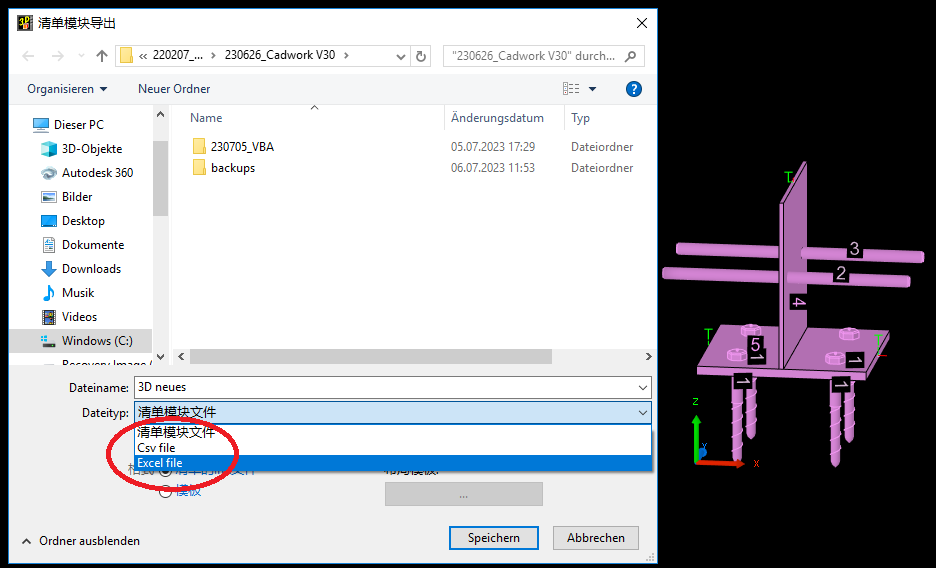
In addition, starting from V30, when exporting material lists, it is possible to export them directly in Excel format without using the Material List Manager (CSV format can already be exported directly in V29).
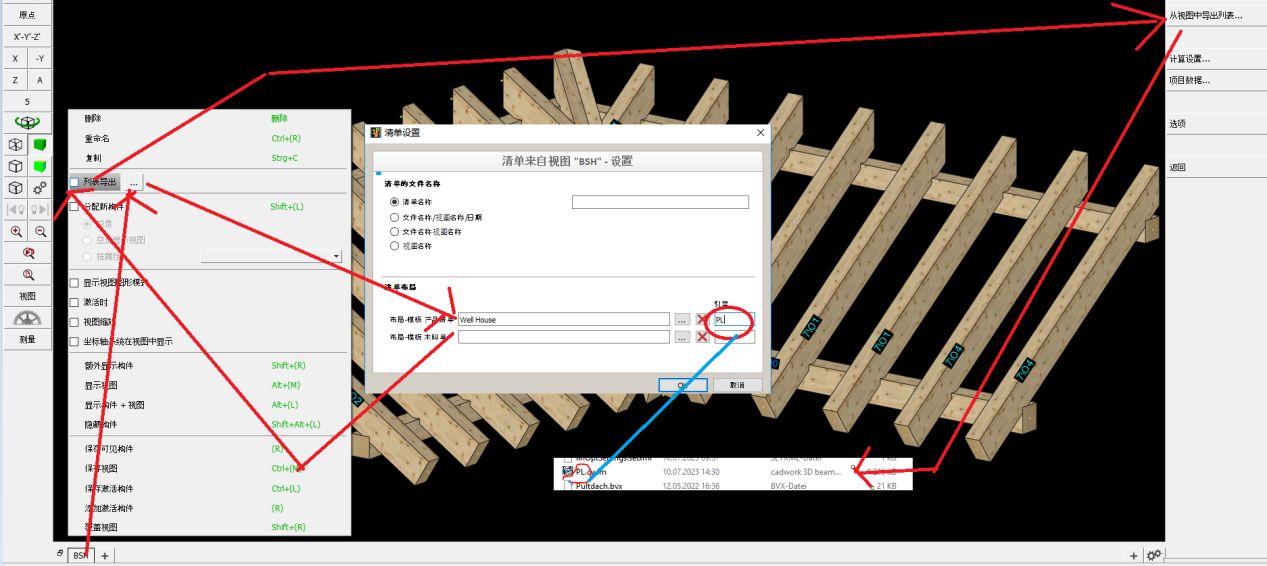
In addition, the material list export properties can be set in the view interface (such as adding a prefix to the file name of the exported material list to distinguish between the production material list PL and the material list SL), and exported from the view page of the material list export.
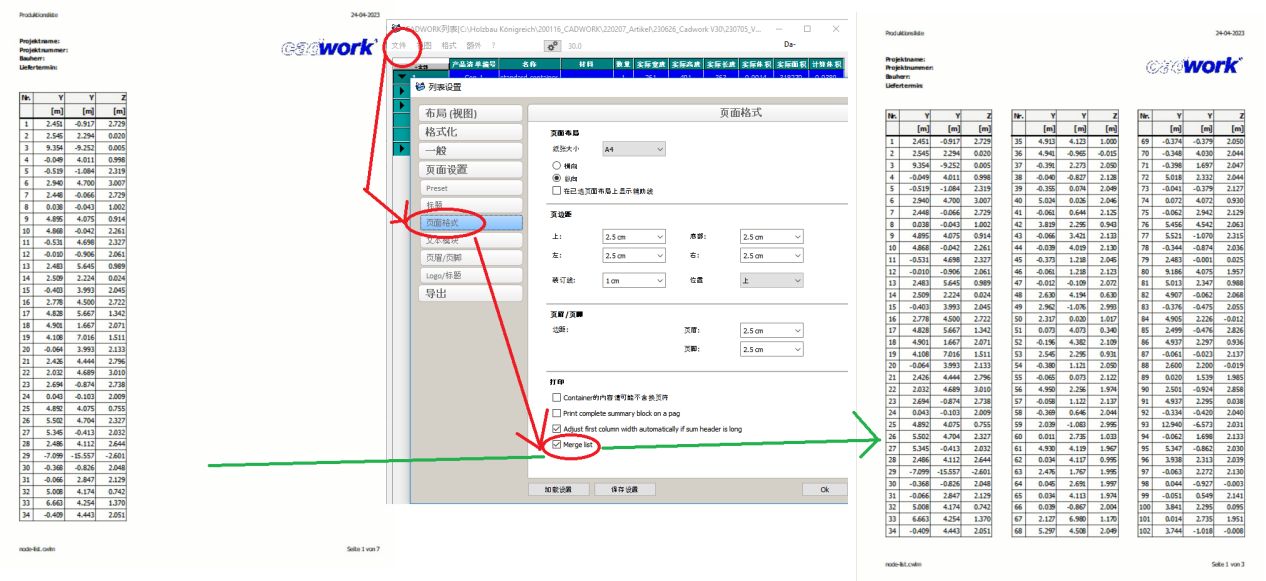
The V30 inventory module has added automatic optimization function for title row height and display setting function for the first column. To determine whether the first numbered column is displayed or not.

For narrower material orders, V30 also introduces the merge display printing function.
For the export of material orders containing sub items, V30 provides the option to expand all exports when exporting CSV files; 2. Fully shrink and export; 3. Export three options according to the current view.